

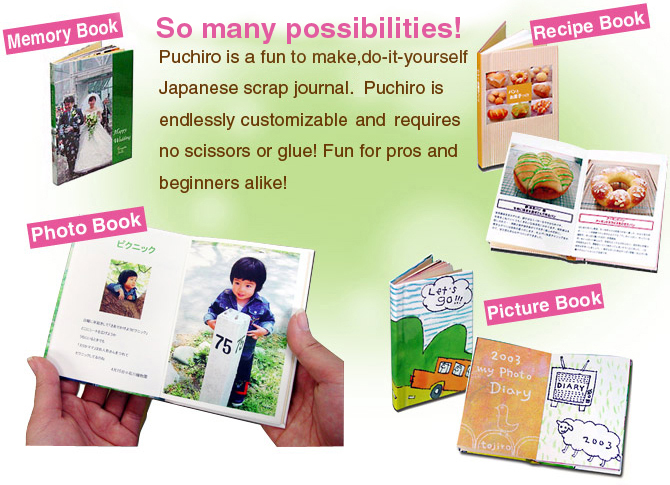
Puchiro's Design
Puchiro is a home bookbinding kit that allows you to easily bind together your own book without using any tools at all. It takes only about 15 minutes to put together, even the first time. The Tojiro Club's special design features, such as the perforated guides included on the kit's sheets, save you from having to use even a ruler or pair of scissors.
Another key feature is the glossy film sheet included for the cover. This laminated sheet, which can be applied by hand, provides an easy way to give your book a beautiful finishing effect as you would see on a commercially printed book.
![]()
Assembly
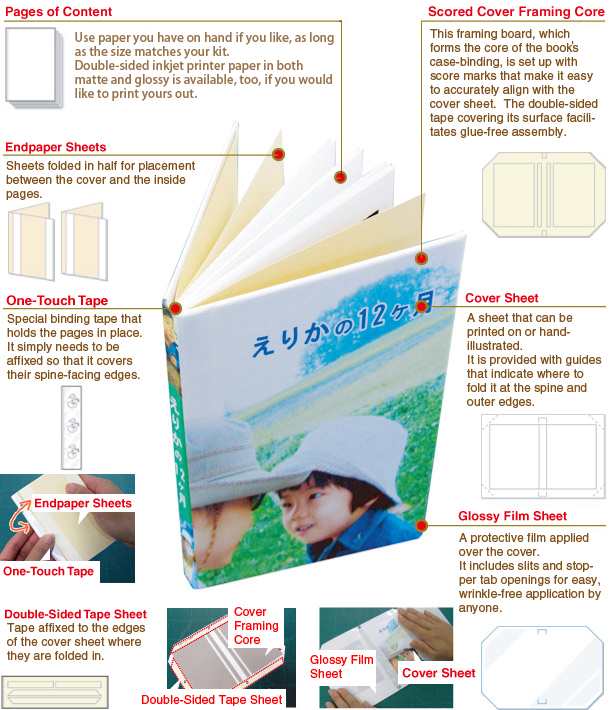
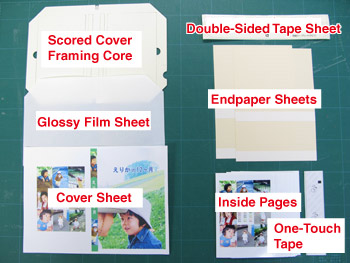
Taking a Look at the Kit's Contents
The "Puchiro" home bookbinding kit is designed so that you can assemble your book in about 15 minutes without using any tools.
 |
 |
 |
 |
 |
 |
 |
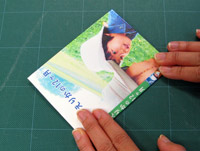
Step 1: Design the Cover & Pages
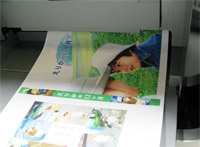
Design the cover sheet. Use your computer to design the cover and print onto the sheet with an inkjet printer, or illustrate it by hand. Either way is fine.
The image layout will be easy to arrange, as the front cover, back cover and spine already have their positions marked with guides on the supplied sheet.
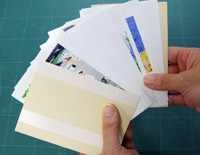
Step 2: Prepare the Inside Pages
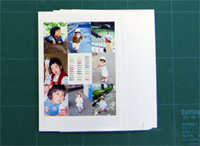
You can use anything you like as content on the pages inside. Photos, illustrations and inscriptions are just a few of the possibilities. Pages printed with an inkjet printer are OK, too, of course. Double-sided printer paper in either matte or glossy is sold separately as well. Double-sided printing will help you achieve an even more book-like appearance.
Step 3: Assemble the Kit's Components
When the cover and the inside pages are ready, use the kit to bind them together as a book.
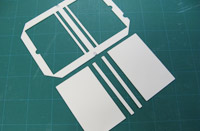
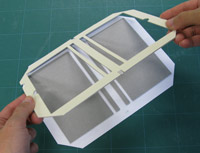
Remove the core sections of the scored cover framing core from the outer frame.
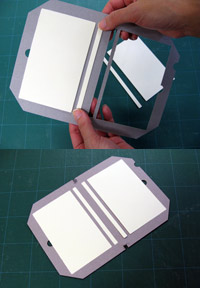
Fit the core sections of the cover framing core (the side with yellow tape) back into the frame (the side that does not have yellow tape.)
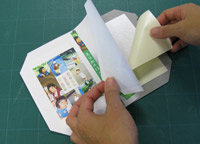
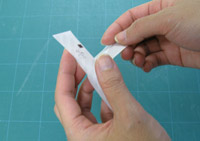
Detach the four triangular corners from the cover sheet at the perforated scoring.
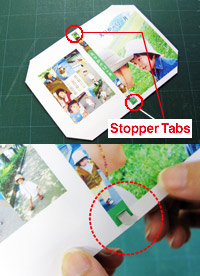
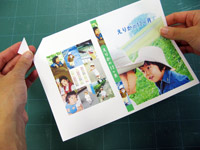
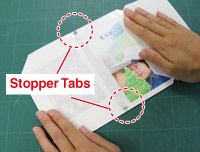
Fit the cover sheet onto the stopper tabs of the scored cover framing core to fix it in place. The cover sheet already has openings for the stopper tabs.
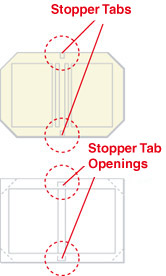
Flip back the cover and peel off the backing from the yellow double-sided tape on the framing core. The stopper tabs will keep the cover sheet held in place already so that you will be able to affix it in correct alignment.
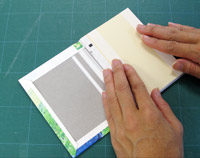
Fit the glossy film sheet (lamination) over the cover sheet and onto the stopper tabs in the same manner.
The stopper tabs will hold it in place, helping to prevent wrinkles and aiding you in applying it by hand.
Turn it over and remove the frame.
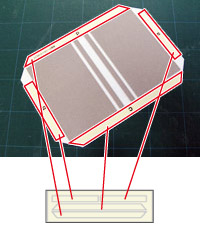
Affix the double-sided tape sheet's strips onto the 4 outer edges.

Peel off the backing from the double-sided tape strips and affix the 4 folded-in edges.
Turn over so that the cover faces up again, and fold to shape the spine of the book.

The cover is now finished.
Next we will add the pages of content inside.
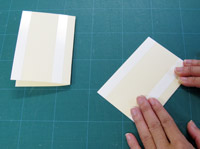
First, fold the endpaper sheets in half.
Place the pages of content in between the double-folded endpaper sheets.
Peel off the backing from the one-touch tape.
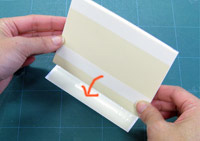
Apply the one-touch tape to the spine-facing edges of the inside pages held between the endpaper sheets.
When the spine-facing edges of the pages are covered with the one-touch tape, the inside pages are ready.
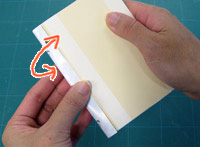
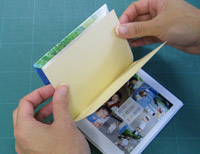
Place the cover and the inside pages together.
Remove the backing from the tape attached to the inside content's endpaper sheets.
Affix to the inside of the cover.
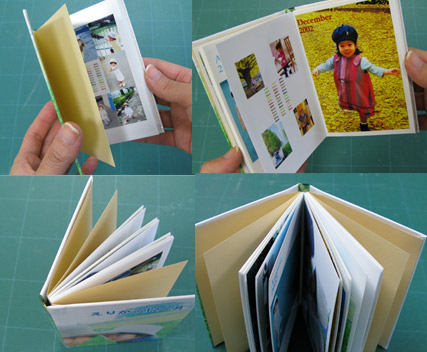
Remove the backing from the opposite side of the endpaper sheets, affix them, and you are finished!!
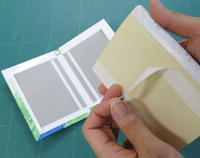
Bonus : Remove & Replace the Pages too!
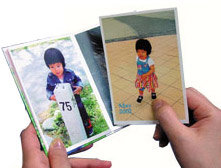
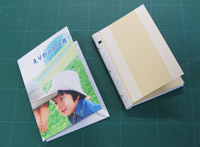
Even after binding your book together, you can easily remove the pages and put them back in the same position. This is due to the fact that the one-touch tape used to bind the book together remains pliable, acting as a sort of cushion, even after it has been affixed to the edges of the pages that face the book's spine.
Your book will, of course, also stay securely held together if you do not remove the pages. You will be able to enjoy a book with a nice adhesive binding as you would find on a commercially sold book.
![]()
US Contact
Market To Japan,LLC
1505 NW Gilman Blvd. Suite #7
Issaquah, WA 98027 USA
Tel:425-378-9216
Fax:425-378-9320
E-mail:info@markettojapan.com
http://www.markettojapan.com/